Bedman/Commands
< Bedman


Guilty Gear Xrd series
Guilty Gear -Strive-


This section is empty or needs to be expanded. You can help the Guilty Gear Wiki by expanding it.

This section is empty or needs to be expanded. You can help the Guilty Gear Wiki by expanding it.
Bedman's crouching walk is a unique movement option used by Bedman between Guilty Gear Xrd -Sign-, and last seen in Guilty Gear Xrd Rev 2.

Forward crawl walk

Backward crawl walk


Deja Vu (デジャブ, Dejabu?) is a unique mechanic used by Bedman between Guilty Gear Xrd -Sign-, and last seen in Guilty Gear Xrd Rev 2.

Task A icon

Task A' icon

Task B icon

Task C icon
By inputting ![]()
![]()
![]() and pressing the respective button, Bedman creates a the hologram of a replay icon between its hands, which then turns into a copy of Bedman made of white noise, which does the Special Attack in place of the logo.
and pressing the respective button, Bedman creates a the hologram of a replay icon between its hands, which then turns into a copy of Bedman made of white noise, which does the Special Attack in place of the logo.
error 6E (エラー シックスィイー, Erā Shikkusu Ī?) is Bedman's unique passive mechanic in Guilty Gear -Strive-
error 6E (
 ver.)
ver.)

 ver.
ver.

 ver.
ver.


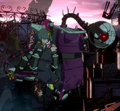
- call 4BA () - A stray blue bolt of electricity launches from Bedman's sparking body that tracks the opponent, pushing the opponent back on contact.
- call 4B3 () - A gasket on Bedman's rear "leg" releases a stream of flames, travelling half-screen. Knocks the opponent down on contact
- call 4B9 (Malfunction) () - Bedman's "head" pops off, effectively becoming a bomb, landing 1/4 of the screen.
All of the error 6E attacks deal the same amount of damage as their parent attacks - including the fully-charged version of call 4B9 (Malfunction).
Additionally, error 6E's properties can be altered with call 0x$0.20/0x$1.00 to change its timing, and call 13C to increase their power.
This section is empty or needs to be expanded. You can help the Guilty Gear Wiki by expanding it.
Task A (タスク Α, Tasuku Ei?) was first introduced in Guilty Gear Xrd -Sign-, and last seen in Guilty Gear Xrd Rev 2.
Also has an alternate version called Task A' (タスク Α', Tasuku Ei Dasshu?, lit. Task A-Dash).

Task A/A'
- GGXrd Task A Air.png
Aerial ver.
Task A Deja Vu icon
Task A' Deja Vu icon

If Task A' hits the opponent, Bedman will teleport directly in front of them. Unlike the regular Task A, Task A' doesn't boomerang back.
Task B (タスク B, Tasuku Bī?) was first introduced in Guilty Gear Xrd -Sign-. Renamed call 4B3 (call 4B3(コール フォービースリー), Kōru Fō Bī Surī?) in Guilty Gear -Strive-.
GGXrd

Task B
Deja Vu icon

GGST

call 4B3

Aerial ver.
error 6E follow-up


This section is empty or needs to be expanded. You can help the Guilty Gear Wiki by expanding it.
Task C (タスク C, Tasuku Shī?) was first introduced in Guilty Gear Xrd -Sign-, and last seen in Guilty Gear Xrd Rev 2.

Task C
Deja Vu icon

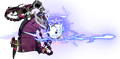
call 4BA (call 4BA(コール フォービーエー), Kōru Fō Bī Ē?) was first introduced in Guilty Gear -Strive-, replacing Task A.
Bedman shoots a spike out of its intact "hand", which travels full-screen and partly tracks the opponent - while it tracks their position on startup, the spike will always travel straight in the direction it's facing.
After using call 4B3, error 6E starts activating. In this instance, a stray bolt of electricity fires off of Bedman, also pushing the opponent back. The bolt will partially track the opponent's position in the same way call 4BA does.
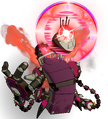
call 4B9 (Malfunction) (call 4B9 (後に誤動作)(コール フォービーナイン), Kōru Fō Bī Nain (Nochini Godōsa)?, lit. call 4B9 (Subsequent Malfunction)) was first introduced in Guilty Gear -Strive-, replacing Task C.
Bedman swings its broken "arm" overhead, which explodes on impact as the opponent gets launched. If call 4B9 is blocked, it inflicts Guard Crush. Holding the button delays and charges the attack, increasing the damage of the attack, duration of the Guard Crush, and the height which the opponent is launched. After using call 4B9, error 6E starts activating. In this instance, Bedman's "head" falls off its body, becoming a bomb that also launches the opponent. It inflicts Guard Crush on block, and does more damage if the original move was charged. If Bedman is hit while the head is airborne but has not exploded yet, it will dissipate without exploding.
The call 0x line of moves were first introduced in Guilty Gear -Strive-.
call 0x$0.20
call 0x$1.00


- call 0x$0.20 (call 0x$0.20(コール ポイント トゥー), Kōru Pointo Tū??, lit. call point-two) has Bedman lean back, his exposed eye flashing red for a moment. This makes the following error 6E attack come out instantly while he's sparking.
- call 0x$1.00 (call 0x$1.00(コール ワン), Kōru Wan?, lit. call one) has Bedman lean back, his exposed eye flashing cyan for a moment. This resets the following error 6E's charge time by while he's sparking. This can be done infinitely as long as Bedman has an error 6E ready.
This section is empty or needs to be expanded. You can help the Guilty Gear Wiki by expanding it.
Sinusoidal Helios (サイノソイダルヘーリオス, Sainosoidaru Hēriosu?) was first introduced in Guilty Gear Xrd -Sign-, and last seen in Guilty Gear Xrd Rev 2.
The "head" of the bed frame opens out to turn into an old-style alarm clock that hangs above Bedman, which rings loud enough to create jagged shockwaves either side of him. If used in the corner, it causes a wall splat.
This section is empty or needs to be expanded. You can help the Guilty Gear Wiki by expanding it.
Hemi Jack (ヘミジャック, Hemijakku?) was first introduced in Guilty Gear Xrd -Sign-, and last seen in Guilty Gear Xrd Rev 2.
Bedman creates a hologram of a black circle with 6 red eyes, which then summons a black-and-red sketch of a ram that slowly chases the opponent for 5 seconds.
If the opponent jumps into the ram, it turns into a cloud that circles around the opponent, then bursts into smoke, immediately stunning them and brings Bedman in front of them.
The ram can be attacked while it's moving, making it teleport away up to 3 times before disappearing.call 13C (call 13C(コール サーティーンシー), Kōru Sātīn Shī?) was first introduced in Guilty Gear -Strive-.
Activation cinematic
call 13C state


- GGST call 13C P.png
Enhanced error 6E (
ver.)
- GGST call 13C S.png ver.
- GGST call 13C HS.png ver.
- 's lightning bolt now launches the opponent on hit and inflicts Guard Crush when blocked.
- 's fire trail covers more space, hitting fullscreen as well as causing 9 hits total instead of 5.
- 's explosion becomes substantially larger, and launches the opponent higher usual.
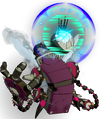
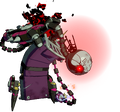
call 4CC (call 4CC(コール フォーシーシー), Kōru Fō Shī Shī?) was first introduced in Guilty Gear -Strive-.
Bedman forms a sphere of black & red energy in its working "hand" while Delilah ducks down to take cover. The energy ball then bursts upon reaching its maximum size, the recoil great enough to make itself bend over backwards. While this lacks range, it is completely invincible and launches the opponent on contact. If used in the corner, it causes an Area Shift.
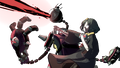
Theatre Of Pain (シアターオブペイン, Shiatā Obu Pein?) is Bedman's first and only Instant Kill, first appearing in Guilty Gear Xrd -Sign- and last appearing in Guilty Gear Xrd Rev 2.

Initial attack

BAD END screen

"If getting up after a fall and trying again was really all it took to win, then we'd all be winners, wouldn't we?"


The following is Bedman's move list in Guilty Gear Xrd -Sign-, -Revelator- and Rev 2:
| Type | Name | Command |
|---|---|---|
| Normal | -- | |
| Special | Task A | |
| Task A' | ||
| Task B | ||
| Task C | ||
| Déjà Vu | ||
| Overdrive | Sinusoidal Helios | |
| Hemi Jack | ||
| Instant Kill | Theater of Pain | Enter Instant Kill Mode → |
The following is Bedman?'s move list in Guilty Gear -Strive-.
| Type | Name | Command |
|---|---|---|
| Normal | -- |
|
| Special | call 4BA | |
| call 4B3 | ||
| call 4B9 (Malfunction) | ||
| call 0x$0.20 | ||
| call 0x$1.00 | ||
| Overdrives | call 13C | |
| call 4CC |